Category: Powershell

ExifTool, moving from cmd line to Powershell

ExifTool, moving from cmd line to Powershell

Previously I highlighted the issue in using Exiftool and getting it to add GPS data to a photo. Now that that issue is resolved (see here) we move on to getting it to work within Powershell.

Getting it to work within Powershell is important for myself as I’m using that to copy photos from my SD card onto my machine much much faster than the Sony software can (see here). So why not reuse this script and as well as copying it across, I can add GPS data and also copy it across.

The Command

exiftool -GPSLatitude*=56.9359839838 -GPSLongitude*=-4.4651045874 DSC00320.JPG  

Above we have a working command. Powershell can call executables in various ways as can be seen here.

Option 1 – The & operator

This failed as the parameters for exiftool require to be more than a single string, which is what the & does. If you look at the link to the MS article I tried all the & options it suggests and nothing was close to working.

Option 2 – Direct call

Direct call requires to add .\ if the item isn’t in the PATH or some other means to grab the correct folder location. I had the exiftool in the same folder as the script so .\ did me just fine.

Cut to the chase…

There is an issue with powershell, and the - cause it issues. See this issue listed here

This meant on my first pass I had to split it into 2 requests to correctly update the GPS.

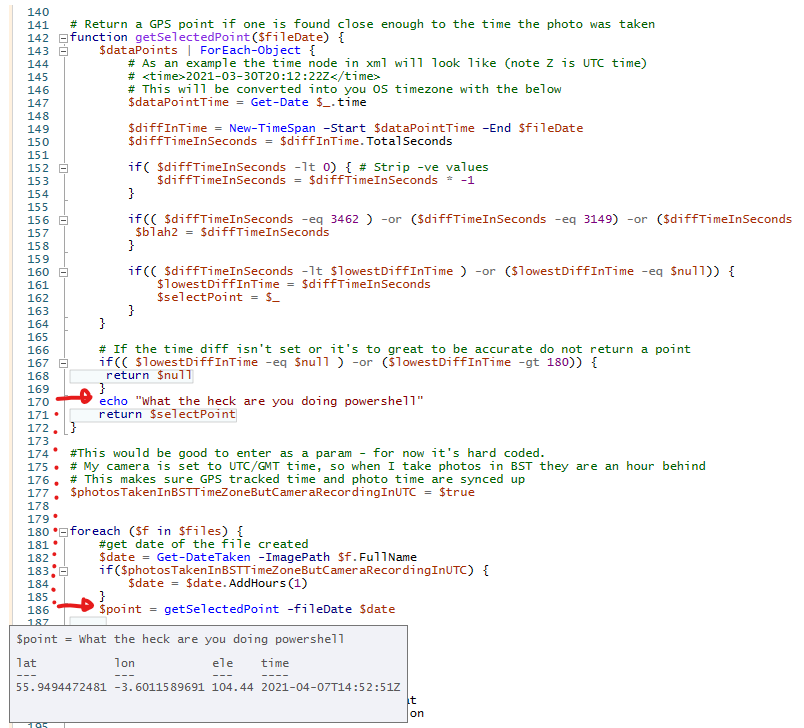
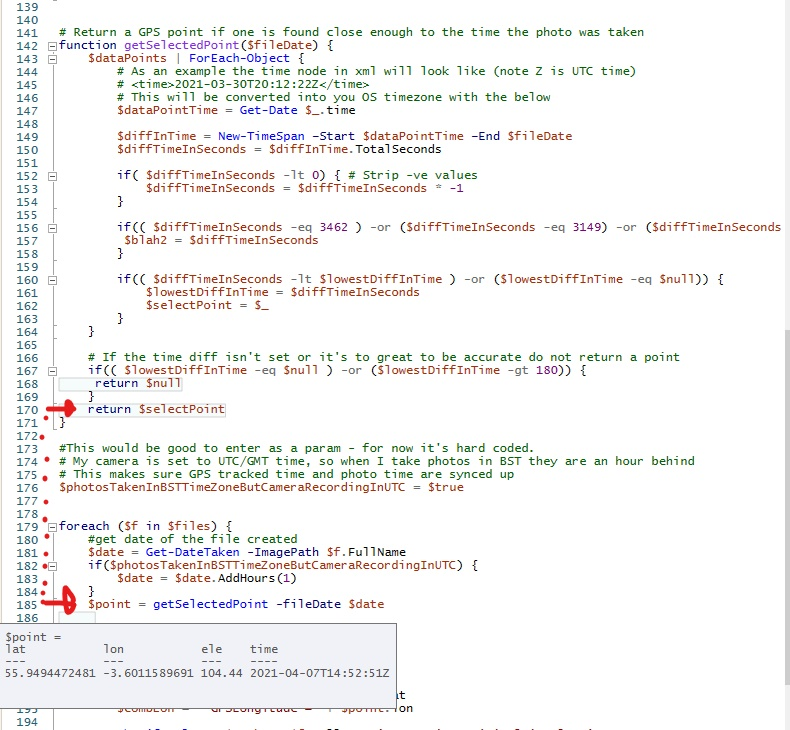
$combLat = '-GPSLatitude*=' + $point.lat
$combLon = '-GPSLongitude*=' + $point.lon

.\exiftool.exe $combLat $f.FullName '-overwrite_original_in_place'
.\exiftool.exe $combLon $f.FullName '-overwrite_original_in_place'

Now with the use of backticks I can do the following

.\exiftool.exe `-GPSLatitude*=$point.lat `-GPSLongitude*=$point.lon $f.FullName -overwrite_original_in_place

Phew…

That tiny piece of code above (change to backtick) took so long and with a combination of human error and not knowing the order to use a ` or a ‘ or a ” or even a range of them required fair bit of trial and error.

It’s on Github

If you wish to view the full code, grab it, run it, etc then head over to this link.
I’ve seriously cut back this post as so many things I’ve learnt, but the easiest way for you pick up from my learning is to just view the code. A picture may well speak a 1000 words. But a 100 lines of code is so much better than 10,000 words in a blog 😉

https://github.com/delp–/GPS_Sony_Photo_data_merger

ExifTool, Powershell, Cmd line – adding GPS

ExifTool, Powershell, Cmd line – adding GPS

So you’ve got some photos, those photos do not have any location data. You have some data and you wish to automate adding that data to your photos.
The concept is simple, yet there are numerous hurdles to overcome.

I’ll highlight some of the issues I hit along my journey so you do not have to. See previous post which is another hurdle I had to overcome.

It works on the command line

First step is to get the Exiftool from here if you wish to follow along. This does the actual adding, you just need to know what and how to call it.

Next up, is that you are going to test it working on a single image and most of the examples I was reading involved the command line. So off I went.

This is the XML node containing the data

<trkpt lat="56.9359839838" lon="-4.4651045874">
    <ele>30.42</ele>
    <time>2021-03-30T20:09:56Z</time>
</trkpt> 

So you pull out the latitude and longitude and come up with the following:

exiftool -exif:gpslongitude=-4.4651045874 -exif:gpslatitude=56.9359839838 -GPSAltitude=30.42 DSC00320.JPG

Important to note that I’ve copied the exiftool.exe into the same folder as the image and the above command is run from that same folder. Means you don’t have to worry about paths. Makes it simple for initial start up.

So I run the above, it works – sort of! No errors, I take the image, drop it into either Flickr or a free app that shows the location the photo has been tagged with. Hmmmm, it’s not right. That location is in Scotland, but the map is showing it as somewhere in the middle of the North Sea!

Reason it failed is that GPSLatitude/GPSLongitude needs a reference to it’s place in the world, as in which quadrant it’s in. So that would be N/S/E/W. But I do not have that data. In my case the data is negative, so that means it’s West and not East. But this command only takes the number as if it was positive! It completely ignores that fact I gave it a negative value!

Next option

So exif failed. Googling, I can see that if I use the xmp commands, they can handle negative values, as in it does not require the reference values of N/S/E/W

exiftool -xmp:gpslongitude=-4.4651045874 -xmp:gpslatitude=56.9359839838 -GPSAltitude=30.42 DSC00320.JPG 

Again no errors. I load the file into GeoSetter and it shows me exactly where I expect the photos location to be. Wonderful. It worked then. NOPE!!!!

I load the exact same file into Flickr, and yet again, the same as the first command it places the photo’s location into the North Sea! 😕 Trying this in various ways and same thing each time. Works in GeoSetter, but not in Flickr. What on earth is going on???

Debugging/Comparing tags

Firstly I went to look at the GPS location while inside of GeoSetter and if I tried to change it there, it gave me the following warning.

After setting this in GeoSetter, the file with no changes to GPS location then worked in Flickr!

So now that it worked in both GeoSetter and Flickr I presumed that the reason it failed initially in Flickr was due to some timestamp/date issues. Perhaps Flickr being a bit more professional than a free app, it respected the rules in a stricter fashion. WRONG, the reason it failed was not down to the timestamp! On adding the timestamp, Geosetter also updated the geotags which made it work in Flickr.

Had I known this command at the start which outputs exif tags in groups that would have help hugely in debugging the situation.

exiftool -a -G1 -s E:\CameraAddGPS\TestFolder\before\photos\DSC00939.JPG

Correct command to insert GPS with only lat/lon

exiftool -GPSLatitude*=56.9359839838 -GPSLongitude*=-4.4651045874 -GPSAltitude*=30.42 DSC00320.JPG 

You can see that the parameters include a wildcard and what that allows is to only give the lat/lon and it will then work out the N/E/S/W based on the -ve or +ve values given. 👌

Now that works in both Flickr and Geosetter. Brilliant 😍
Next up is to figure out how to do so from within Powershell. (see my next post, coming soon)

Additional info

Just a FYI, if you run the above command to output the grouped data on the files, the below is what you see. The text on the left if from the data of the file that works in all places (Flickr and Geosetter), and the text on the right is from the file that only worked in Geosetter.

You can see that both have the correct data, but the one on the left (which works in all places) has the data inside the main GPS tagged group, whereas the one on the right has some different Composite data and XMP-exif data which isn’t standard enough for Flickr to pick up.

Powershell – What on earth are you returning?

Powershell – What on earth are you returning?

I’ve finished a ‘minor’ project where I extended my previous Powershell script seen here – https://www.kennethsutherland.com/shell/copying-files-using-powershell-sd-card-to-pc/

What’s new and what did I solve?

I’ve got a Sony RX10-IV and one of its drawbacks is that is doesn’t have a GPS unit inside it. This is a major bummer as far as I’m concerned. So what to do? I searched, read various guides and yet nothing simple jumped out to solve my issue. Ideally I wanted a device to attach to it’s hot-shoe that when I took photos it would write GPS data to the photo. There is nothing, not a single thing that is suitable for the Sony camera.

Before anyone comments, why not use Sony’s phone software to sync up – it’s a huge pile of 💩💩💩 Not getting into why, it just is! PlayMemories and Imaging Edge Mobile are both virtual paperweights. Ready to be binned on my phone now.

So I happen to have an eTrex 30 for when I go hillwalking and as soon as you turn it on, it starts recording it’s location and time. This is stored in a *.gpx file. Sorted! All I need to do is to merge the gpx file with my photos. Sounds simple. Actually nope, took me far to long…

Functions that return way more than you expect!

So you can create functions in Powershell – good.

You create the function flow, and in order to make sure it’s working as expected you put in some echo commands. Great so far.

NO, NO, NO – do not use echo commands inside a method that you are going to return something. It completely MESSES it up!

Some code ->

Look at the below screenshot while debugging some code 👇

If you look at the above image 👆 you can see that the method getSelectedPoint returns the selected point. But it also has a echo.
Inside the debug tooltip you can see that the returned object is more than the point, it’s also got the echo statement!
WTF Powershell! Never seen a language return more than what’s specified to return.

Now check out the same but without the echo

Look at the same debug tooltip when the echo isn’t there. That returned point is just a point.

WARNING – I don’t know Powershell

Must add this warning, as I’m sure those with experience will call out the reasons for the above and no doubt issues with my code. But as a novice in powershell I’m highlighting the issues I stumbled on to get the end result. This took to long to figure out. HTH.

If you’ve got this far and want to know more then head along to this – About Return This is a MS guide about powershell and what it returns. Essentially if you want a standard programming style return, then you can use a class.

Copying files using Powershell (SD card to PC)

Copying files using Powershell (SD card to PC)

I’ve got myself a new camera – Yeah 😎
It doesn’t come with any software to copy images etc over. Boo…
It does say you can manually copy from SD to your machine, but frankly that sucks. I expect software to create things like a nice folder structure automatically. I’m not going to copy, create folder(s), paste multiple times each time I take some photos.

It’s a Sony RX10 IV, so it’s not a cheap camera, and after a hunt online there are offerings that Sony say to use, as in the Capture One software. I grabbed that, gave it a go. Had just over a 1000 images on the SD card that I’d taken (the card has a transfer speed of 250 MB/s) so it’s no slouch!

Fire up Capture One (which has a very annoying register interface) and started to transfer the images. All seemed good.

SLOW!!!

After a short time the Capture One software was reporting it would take another 3 hours and 20 minutes to transfer the photos!
Over 3 hours!
What on earth was it doing?
So I canceled and closed it. Reverted back to my Nikon software (used for older camera), after all, all I wished to do was to copy the photos from one location to another, and at the same time get the tool to create a reasonable folder structure at the same time.

Guess how long that took? I didn’t time it, but it was less than a minute, I’d approximate around 30 seconds.

So the issue wasn’t the card or my computer – it was Capture One.

Options

Looked online for other Sony recommendations, but all I could find was others complaining about the Capture One software – from years ago. Could I use the Nikon software? No I couldn’t, it worked fine for the jpg’s, but it was the Sony RAW files that caused an issue. They have a different file extension than what Nikon use. So their tool doesn’t see those files.

Thought, I could write a wee script to change the file extension of the Sony RAW files to the same type as Nikon. That would be simple.
Then I’m like why don’t I just write a bat file to copy across and create the desired folder structure.

Powershell – not bat

Firstly task is the script wants to look at each file, see when it was created. Use that data to then create a folder structure. That, isn’t actually a simple task with bat files, and the recommendation is to use Powershell. 🙂

First powershell script

So I’ve never created a powershell script before, but as you’ll see in the following code it’s dead easy and very simple to work with.

# SD Card location
$inputDir = "G:\"
# Where to copy file to
$outputDir = "D:\myPhotos\"
# get all files inside all folders and sub folders
$files = Get-ChildItem $inputDir -file -Recurse

# Create reusable func for changing dir based on type
function copyFileOfType($file, $type) {
    # find when it was created
    $dateCreated = $file.CreationTime
    # Build up a path to where the file should be copied to (e.g. 1_2_Jan) use numbers for ordering and inc month name to make reading easier.
    $folderName = $outputDir + $dateCreated.Year + "\" + $dateCreated.Month + "_" + $dateCreated.Day + "_" + (Get-Culture).DateTimeFormat.GetAbbreviatedMonthName($dateCreated.Month) + "\" + $type + "\"
	
    # Check if the folder exists, if it doesn't create it
    if (-not (Test-Path $folderName)) { 
        new-item $folderName -itemtype directory        
    }
    # build up the full path inc filename
    $filePath = $folderName + $fileName
    # If it's not already copied, copy it
    if (-not (Test-Path $filePath)) { 
        Copy-Item $file.FullName -Destination $filePath        
    }
}

foreach ($f in $files) { 
    # get the files name  
    $fileName = $f.Name
    if ( [IO.Path]::GetExtension($fileName) -eq '.jpg' ) {
        copyFileOfType -file $f -type "photos"
    }
    elseif ( [IO.Path]::GetExtension($fileName) -eq '.arw') {
        copyFileOfType -file $f -type "raw"
    }
    elseif ( [IO.Path]::GetExtension($fileName) -eq '.mp4') {
        copyFileOfType -file $f -type "movies"
    }
    else {
        #Do nothing
    }    
}

How to run?

Three steps are needed.

  • Copy the above code and paste it into a ps1 file. So give it a name such as transferFiles.ps1 (really doesn’t matter)
  • On the first instance, open Powershell as Admin
    • run this Set-ExecutionPolicy RemoteSigned
    • this lets you run you script locally, if you don’t do this and try to run any powershell script that you create, it will give an error.
  • Run the script. Either right click and ‘run with Powershell’ or call it from the Powershell cmd.

Explanation – change it?

I’ve included a load of comments, so hopefully it should be clear. Essentially if you want to use it yourself, you will wish to change the

  • $inputDir To wherever you original images are.
  • $outputDir Where you’re existing photo root folder is.
  • $folderName is what I’ve used to define the created folder structure. Feel free to change to your personalisation.
  • The RAW file type extension of Sony is arw. Your type may be different. I split the different file types into different folders. That’s just my preference. Do what you wish.

Result

The above shows what the output is. Simple folder with year, then combined month and day and the named month. The reason I do this is for ordering via the name. If the date was first then you’d get the 1st of each month together, so the whole list wouldn’t be in chronological order when in alphabetical order.

Improvements

  • I could make this happen automatically when the card is inserted into my machine.
  • I could delete the files once it’s copied (and added verification that they’d been copied!).
  • Could add in duplicate coping to my back up NAS drive

Sure with this being my first go at a powershell script there are ‘wrong’ items, but hopefully it will give someone an idea of what to do. Hopefully it works at speed on 1000’s of files as well! I’ve only tested it on a few files right now. Gives me an excuse to go out and fill the camera SD card with a load of photos 🤣